Creating Photo Objects by Removing Background From Images
In this tutorial, the image background will be removed using the
Exract filter in the Adobe® Photoshop® CS3®. Please note that the
Extract filter is not installed in Adobe® Photoshop® CS4®, therefore,
you have to download the plug-in for Windows or for Mac OS and install it manually.
You can also download the following sample image
to be used with this tutorial.
We will use a mask to hide the white background from the image. In the
tutorial, we will remove the solid background color.
|
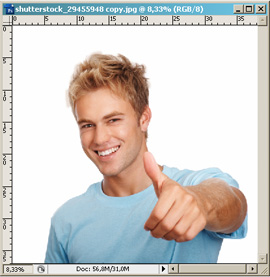
| Step 1. Open an image with the background you would
like to remove.
A higher image resolution makes it easier to work on an image. It also
reduces the visual defects that might appear on contour lines after the
image downsizing.
|
 |
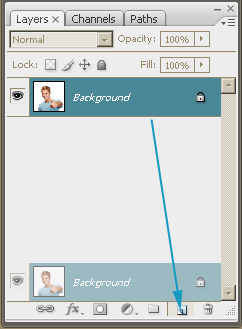
| Step 2. Drag the layer to the New Layer
icon to duplicate the layer.
That will be your working layer. |
 |
|
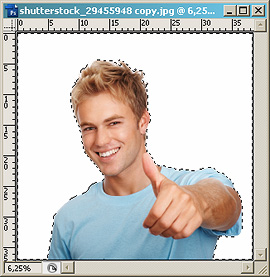
Step 3. Start the erasing from the clear lines and then
proceed to the unclear areas, for example, hair requiring more elaborate
contouring.
- Select the Magic Wand tool by pressing the <W>
key.
- Set the Tolerance to 25-30.
- Check the Anti-alias and Contiguous boxes.
- Then click the white background on the object.
|

 |
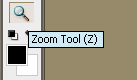
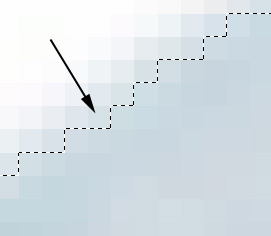
| Step 4. Use the Zoom Tool (press <Z>)
to magnify the contour of the selected object.
Please note that the selection should grab some pixels from the
object, as this will partially eliminate the pixel noise around the
extracted object.
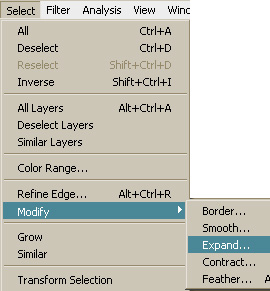
You can also use the Expand or the Contract commands
to adjust the selection. |
 |
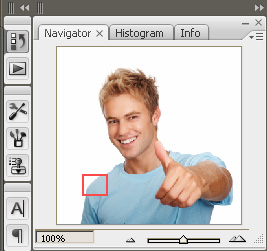
| Additionally, you can use the focus frame in the Navigator
window to further inspect your selection. |
 |
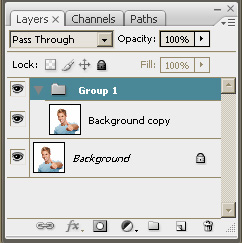
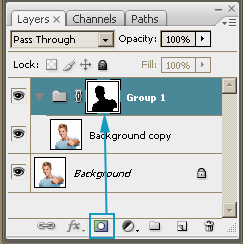
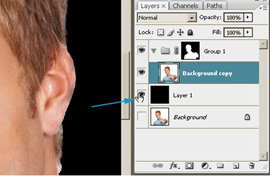
| Step 5. Press <Ctrl + G> to create
a new layer group, as, in our case, the mask will be applied to the
group of layers.
Please note that the Background copy layer should be inside
the newly created group.
|
 |
| Click the "Create Mask" icon in layer palette.
Compare the result with the picture.
For definition of a mask, please refer to the "Used
Terms" section. |
 |
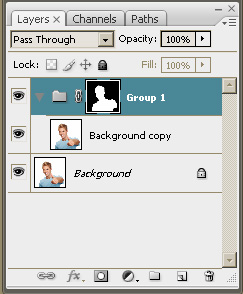
| Step 6. Invert the mask by pressing <Ctrl
+ I>.
The black area of the mask hides the part, the white background in
our case, erased in the original image.
|
 |
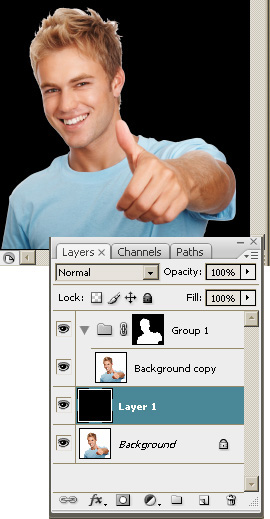
Step 7.
- Select the Background layer.
- Press <Ctrl + Shift + N> to create a new layer.
Please see the figure.
- Use the Color Picker to select the Black (#000000)
color.
- Use the Paint Bucket tool to fill the new layer with black.
Now you should see the extracted object on the black background.
This helps to notice the possible, even slightest, inaccuracies. In
our example, you should see some white areas over the hair that should
be removed. |
 |
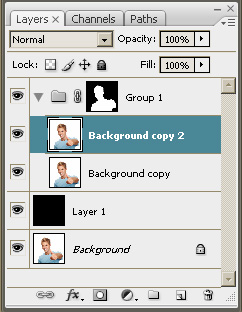
Step 8.
- Select the Background copy layer.
- Then press <Ctrl + J> to duplicate the layer.
|
 |
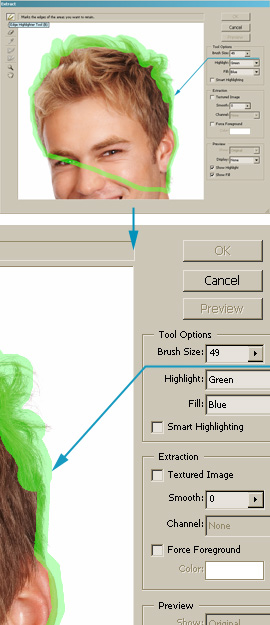
Step 9. While staying on the newly duplicated
layer:
- Open the Extract tool by pressing <Ctrl + Alt + X>.
Alternatively, you can select it from the Image menu.
- Press <B> to enable the Edge Highlighter.
- Highlight the hair area as shown on the figure.
Please note that:
- You should work only on the intricate edges, as the mask for the
rest of the image areas is already done.
- You can create more blurred edges by using larger brushes. The
brush size is set in the Brush Size field, or using the <[>
and <]> keys to enlarge or to downsize the brush.
- Use <Ctrl + Z> to undo the last action.
- Use the Eraser tool, or press <E>, to clear
the highlight.
- Use <Ctrl + "+"> and <Ctrl + "-"> to
zoom in and out.
- Use the Hand tool (hold <Spacebar>) to scroll
the image, if necessary.
|

 |
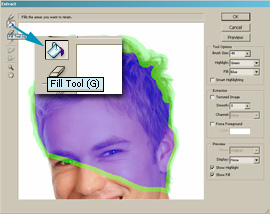
- Select the Paint Bucket tool, or press <G>.
- Fill in the area inside the highlighted area.
Please note that the green highlight should be closed.
If your blue selection fills area beyond the green highlight:
- Undo the fill by pressing <Ctrl + Z>
- Use the Edge Highlighter, press <B>, to close
the highlight.
- Fill the area inside the highlight.
|
 |
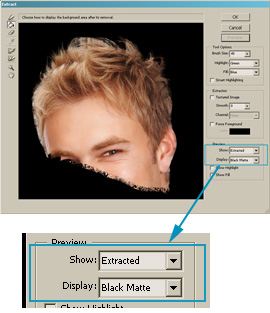
- Click Preview.
To see the extracted object on the black background, select Black
Matte in the Preview Options -> Display.
It might be helpful while editing the mask to see the contours of
the extracted image and erased area.
|
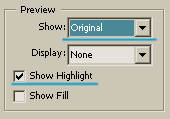 |
- Click OK to apply the Extract tool.
|
|
| Step 10. Now you need to adjust the original
mask appending the detailed hair part made from the newly extracted
object.
Please note, before appending we need to erase the rough hair areas
in the original mask.
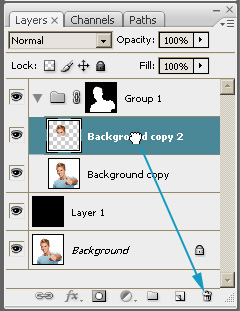
Select a working area:
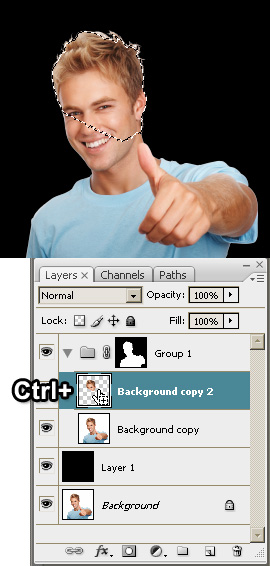
- Load the selection by clicking on the Background copy 2
thumbnail while hold the <Ctrl> key.
|
 |
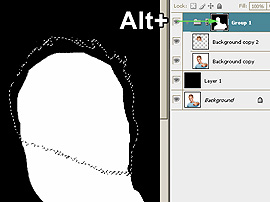
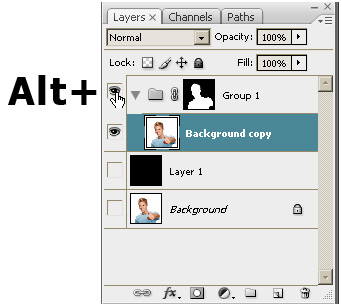
- Select the folder mask by clicking the mask thumbnail while
holding the Alt key.
|
 |
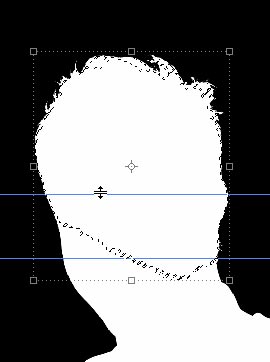
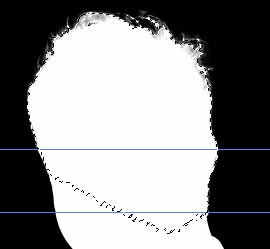
- Toggle Rulers by pressing <Ctrl + R>
- To place a new guide click the top horizontal ruler.
- Holding the left mouse button drag the new guide down to place on
the working area.
- To change the guide position:
- Select the Move tool (press <V> key.
- Click on the line.
- While holding the left mouse button and drag the guide.
|
 |
- Select the Brush tool (press <B>).
|
 |
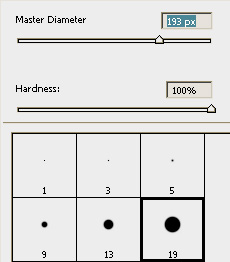
- Select a hard brush.
- Select the brush size.
|
 |
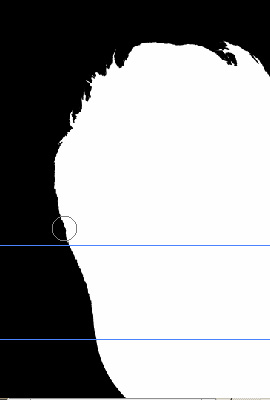
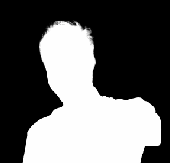
- Paint the hair area of the original mask in black, as shown in the
figure.
|
 |
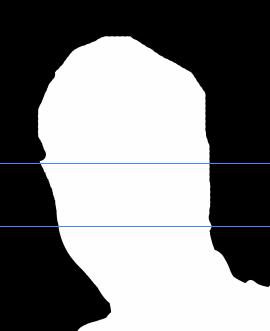
- You should end up with somewhat the following:
|
 |
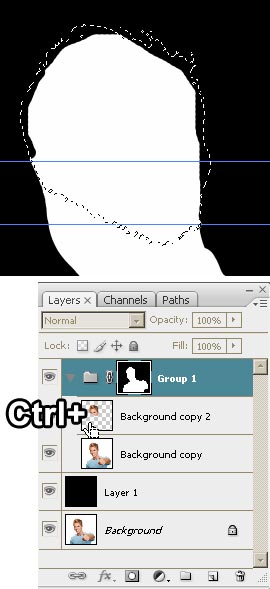
- Load the selection from the Background copy 2 by hold down
the <Ctrl> key and clicking on the layer thumbnail.
|
 |
- Select the folder mask by clicking the mask thumbnail while
holding down the <Alt> key.
|
|
- Set Foreground Color to white, #FFFFFF.
|
 |
- Fill the selection with white by pressing <Alt +
Backspace>.
- Remove the selection by pressing <Ctrl + D>.
|
 |
- Now, you can remove the guides:
- Press <V> to select the Move Tool.
- Drag the guides to the rulers out of the document borders.
- Your final mask should look similar to the one on the figure.
|
 |
- Click the folder thumbnail of the Group 1 group to see the
applied mask.
|
 |
- Remove the Background copy2 layer.
|
 |
- Toggle the layer by clicking the Group 1 thumbnail while
holding the <Alt> key.
|
 |
| Congratulations! You have successfully extracted the
object from the original image. |
 |
Step 12. If the quality of the extracted object
is good, you can save the results:
- Save the original project as PSD.
- Create a copy of the original project using the Saving As
command.
- Downsize the image by pressing <Alt + Ctrl + I>.
- Save for web as a transparent PNG by pressing <Alt +
Shift + Ctrl + S>.
|
 |
| Step 13. Otherwise, you can improve the quality
of the extracted object by editing the contours and correcting the mask
defects.
Before starting editing please toggle on the Layer 1 layer. |
|
| 1. Transparency Defects
Please note, the white color of the mask corresponds to the full
transparency in the applied mask.
To fix the transparency defects of the mask:
- Click the mask thumbnail of the Group 1 group.
- Set the Foreground Color to white, #FFFFFF.
- Select the Brush Tool by pressing the <B> key.
- Select a hard brush.
- Using the brush fix the transparency in the group mask by painting
the required areas, similar to those you see on the figure, with white.
|
 |
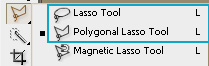
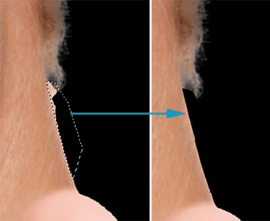
| 2. Unnecessary Background Pieces
To remove the unnecessary background pieces:
- Select the area of an unnecessary piece using the Lasso
tool.
- Toggle the group mask by clicking on the thumbnail.
- Set the Foreground Color to black, #000000
- Make the selected opaque by pressing <Alt + Backspace>,
filling with black.
|
 |
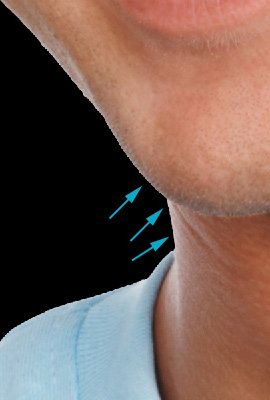
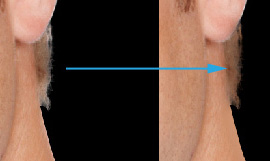
| 3. Edge Overexposure
The edge overexposure frequently occurs in images with white
background. |
 |
|
To fix the problem:
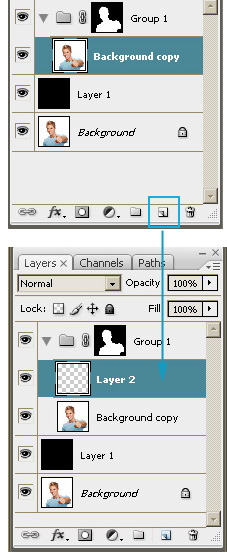
- Add a layer by clicking on the New Layer icon.
Please note that the layer should be located above the Background
copy layer.
|
 |
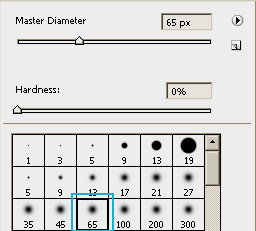
- Select the Brush Tool by pressing the <B> key.
- Select a brush with a soft edge.
|
 |
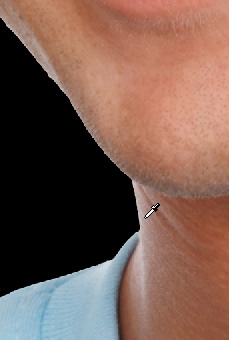
- Use the Color Picker to pick a color close to the one of
the object edge. To do that hold down the <Alt> key and
pressing the left mouse button slightly inside the object edge.
Please note, you should use a darker color than the one of the
edge.
|
 |
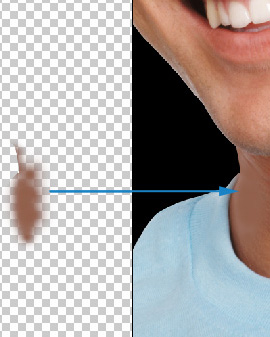
- Select the Layer 2 layer.
- Paint over the small area using the brush.
For more accurate results pick colors corresponding each area
shades.
|
 |
- The hair areas are corrected in the same way.
In addition, please note that you can use the Clone Stamp
tool instead of the Brush tool working on the hair areas.
|
 |
| Go to the Step 12 to save the results. |
|