Design dnn skins with Artisteer
Artisteer is the first and only Web design automation product that instantly creates fantastic looking, unique DNN skins.
Download free templates

Creating DNN skins with Artisteer
DNN (aka DotNetNuke) is an open source Content Management Framework based on Microsoft's .NET technology. Artisteer allows you to quickly design professional DNN Skins without any programming skills or knowledge of Photoshop, Dreamweaver, HTML / CSS, or other web design technologies. Artisteer gives you control over the website design by allowing you to manage and customize DNN skins to your taste.
Here are the steps to quickly create your unique DNN Skins:
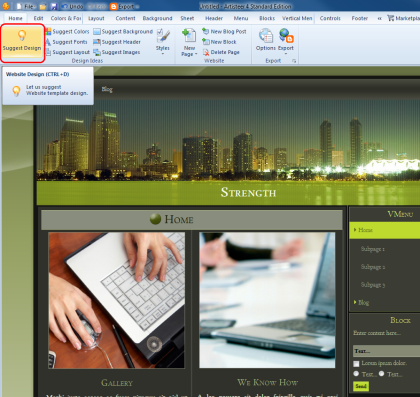
- Run Artisteer and click the "Suggest Design" until you see a design you like.
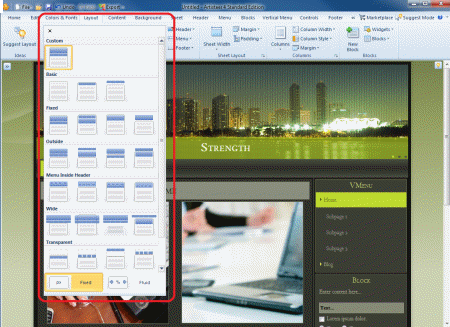
- Modify the design elements, such as layout, fonts, and colors to fine-tune your design.
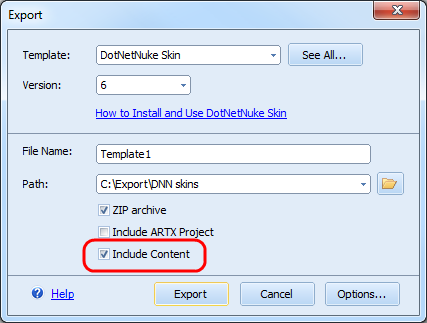
- Export your DotNetNuke skin to a folder on your computer as a zip file and select the DotNetNuke version you are going to use.
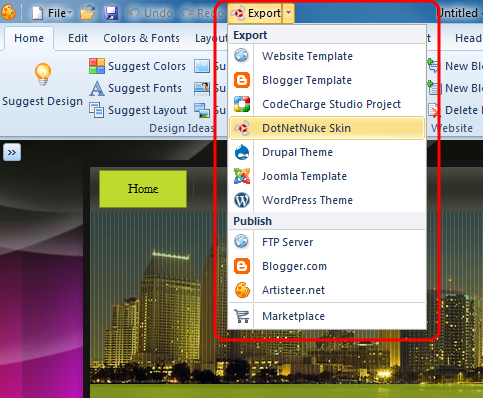
- Starting with Artisteer 4 you can export content to your DNN website. To do this, enable "Include Content" before exporting the template.
Note: Artisteer allows importing content only to DotNetNuke 6.
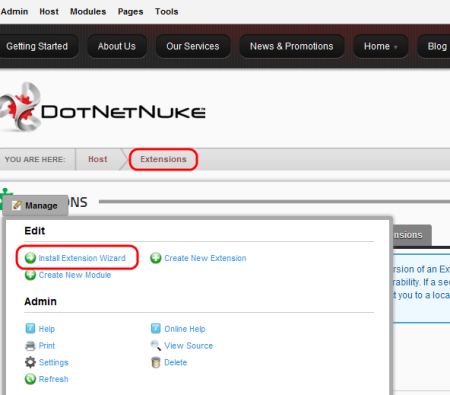
- Upload your newly created skin via DNN Administration (Host) -> Extensions -> Manage -> Install Extension Wizard.
That's it! Congratulations on your great looking DotNetNuke site design that was easily created with Artisteer! For more information refer to
how to install and use DNN Skins.