Documentation > DotNetNuke
Installing and Using DotNetNuke Skins
Installing DotNetNuke 4.9.x Skins
- Log in to your DotNetNuke website as an Administrator/Host.
- Go to Admin -> Skins/Host -> Skins.
- Select the "Upload Skin" option.
- Browse for the exported skin file (<ExportedSkinName>.zip), then click the "Install Skin Package" link.
Installing DotNetNuke 4.9.x Menu Skin Object
- Log in to your DotNetNuke Administration.
- Go to Host -> Module Definition.
- Select the "Install New Module" option.
- Browse for the ArtMenuSO.zip file, and then click the "Install New Module" link.
Note: DotNetNuke 4 is supported only by Artisteer 3.1.
Installing Skins in DotNetNuke 5.1 and 6.x
- Log in to your DotNetNuke Administration area as the "Host" user.
- Go to Extensions -> Install Extension Wizard.
- Browse to the skin file (<ExportedSkinName>.zip) on your local drive.
- Follow the wizard steps until the skin is installed.
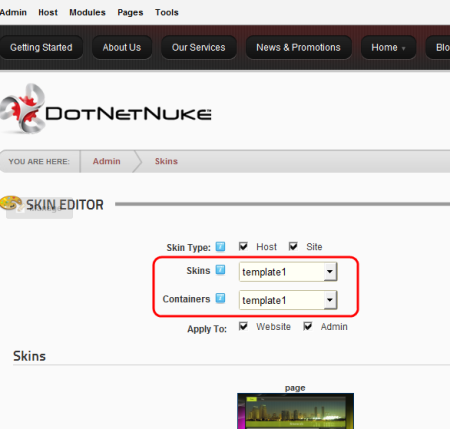
- Go to Admin -> Skins and in the Skin Editor select the Skin and Container.
When the skin and container are applied the import content message appeares:

Note: You can import content from Artisteer 4 only to DotNetNuke 6.
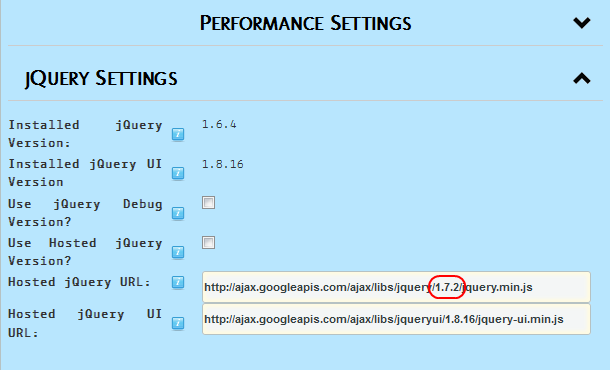
Artisteer 4.0 jQuery Settings
Artisteer 4.0 uses jQuery version 1.7.2 to provide fresh design effects. If you are using skins generated with Artisteer 4.0, please log in to backend as "host", navigate Host Settings > Advanced Settings > jQuery Settings > Use hosted jQuery version and edit the path to the jQuery file by replacing the default version 1(DotNetNuke 5) or 1.6.4 (DotNetNuke 6) with the version 1.7.2:
Working With Vertical Menu
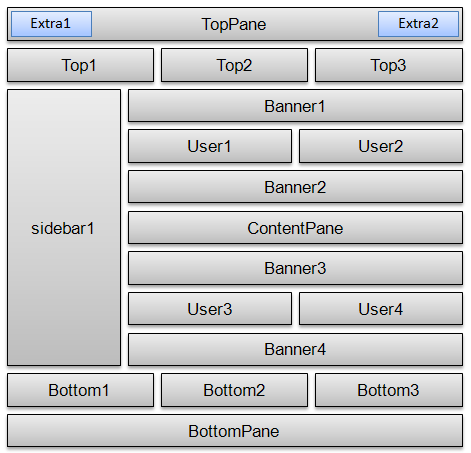
Artisteer automatically creates a vertical menu and saves it as a skin object in the page.ascx file along with the design settings. You may choose to change the vertical menu location on the page by finding the following element inside the page.ascx file, cutting and pasting it in the right place for you:
<dnn:ARTMENU ID="ArtVMenu1" ShowHiddenTabs="False" ShowAdminTabs="True" ShowDeletedTabs="False" ShowLoginTab="True" ShowUserTab="True"
Orientation="Vertical" Caption="" runat="server" />
Please note, modifying the code you take the full responsibility for its validation.
To create a Vertical menu with Sub-Items:
- Enable the Multiple menu levels in Artisteer > Vertical Menu tab -> Submenu -> Levels. Make sure that the sample Vertical Sub-Item works within the template previewed in Artisteer.
- Create a menu with Sub-Menu items in DotNetNuke.The Sub-menu Items should have the parent items specified for them.
Please remember that the Sub-Items will not appear on the cursor hover unless you click the parent item.
Applying DotNetNuke Skins
DotNetNuke skins can be applied at a single page or the entire portal level.
- To apply your Skin to an individual page, go to the Page -> Page Settings and select Page Skin in the Advanced Settings -> Appearance -> Page Skin / Page Container :
<ExportedSkinName - page>.
- To apply your skin to the entire Website, go to Admin -> Site Settings -> Basic Settings -> Appearance -> Site Skin / Edit Skin and select <ExportedSkinName - page> and <ExportedSkinName - page-admin> options from the dropdown lists as shown below:
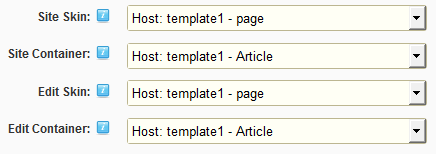
- Click the Update link to save your changes.
DotNetNuke Places