Managing Sidebars in your ‘Website or Blog’ Project
We’ll explain how to create them, how to manage them, and what to do with them once you’ve added them to your template.
If you’re designing your website for a specific CMS, like WordPress, or Joomla, please refer to one of the "Installing and using…" links on our wiki page for more information about using the Vertical Menu, widgets, and modules with your CMS:
Docs & FAQ
Please note this article is based on the standard edition of Artisteer, version 3.1.0.48375. If you’re using a different edition, or version, the features, menus, and dialogs described in this article may not be available.
What’s a Sidebar?
When you create a new Artisteer template, you need to decide on the column layout. In Artisteer, you can create a 1, 2, or 3 column layout.
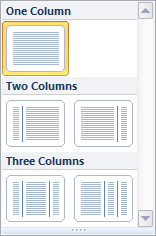
The sidebar(s) are the columns on either side of your Content Area column. With a 1 column layout, there is no sidebar.
What you put in Sidebars are interactive features that make your web pages more accessible. These are called Blocks. For example, a Vertical Menu is a special type of block that allows your viewers to jump to other pages of your site. Blocks normally appear in the Sidebar, but as we’ll show you later, you can also place them in the main Content Area column.
Creating a Style for the Sidebar
After you determine the number of columns for your pages, you may want to consider how you want your Sidebar to look.
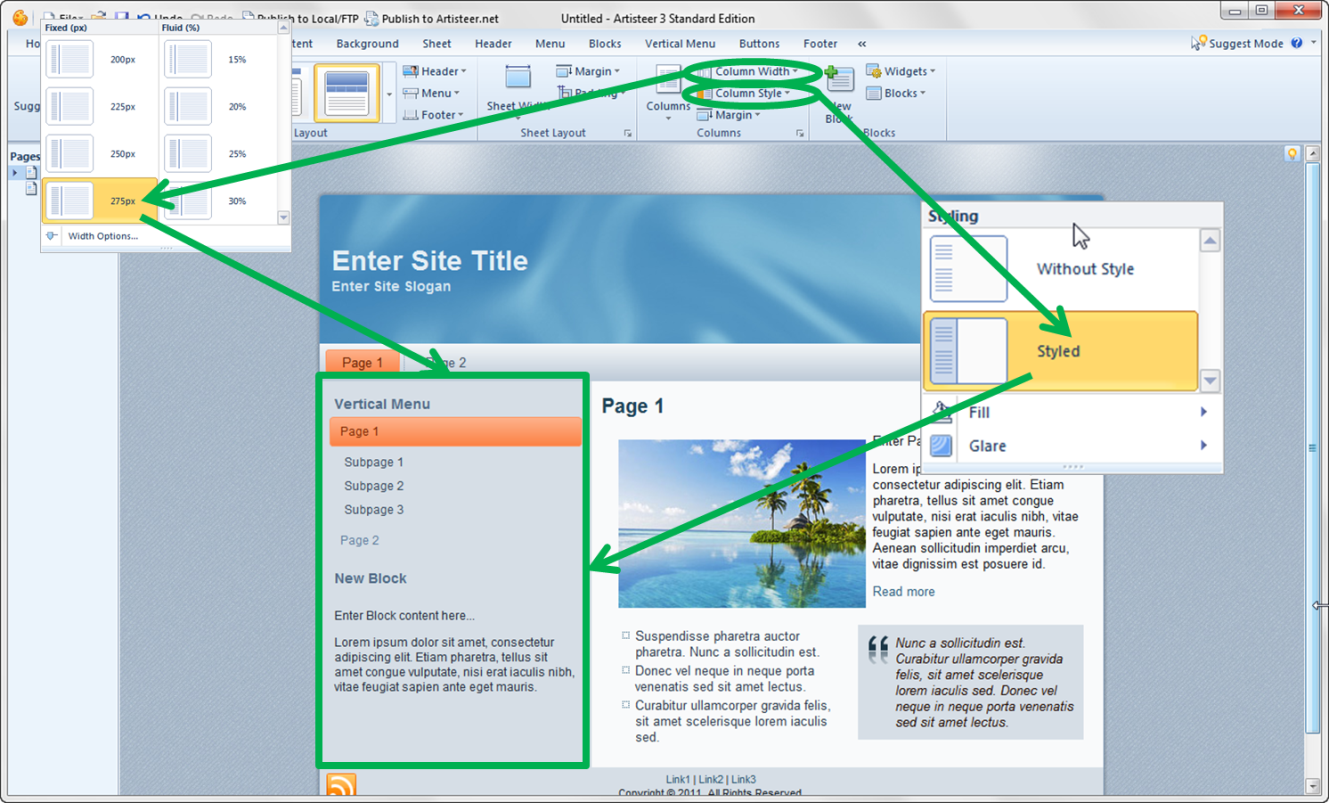
Adding a style to the Sidebar, lets you add a background Fill color, Transparency (Fill→Transparency), and a Glare. Without a style, the Sidebar has the same background as the Sheet.
You can also individually control the styling for each Block in the Sidebar, whether the Sidebar has a style or not.

Blocks contain several other containers and style elements you can control individually, such as the Block Header, Block Background, Block Content, Borders, Fill color, Transparency, etc
Blocks all share the same style, except the Vertical Menu which is styled separately (Vertical Menu tab).
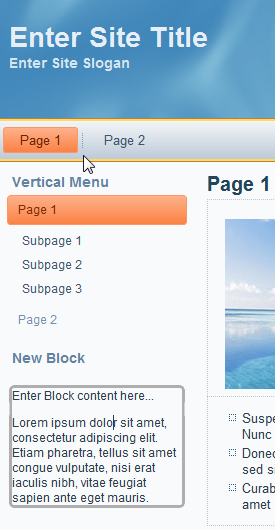
Add a New Content Block
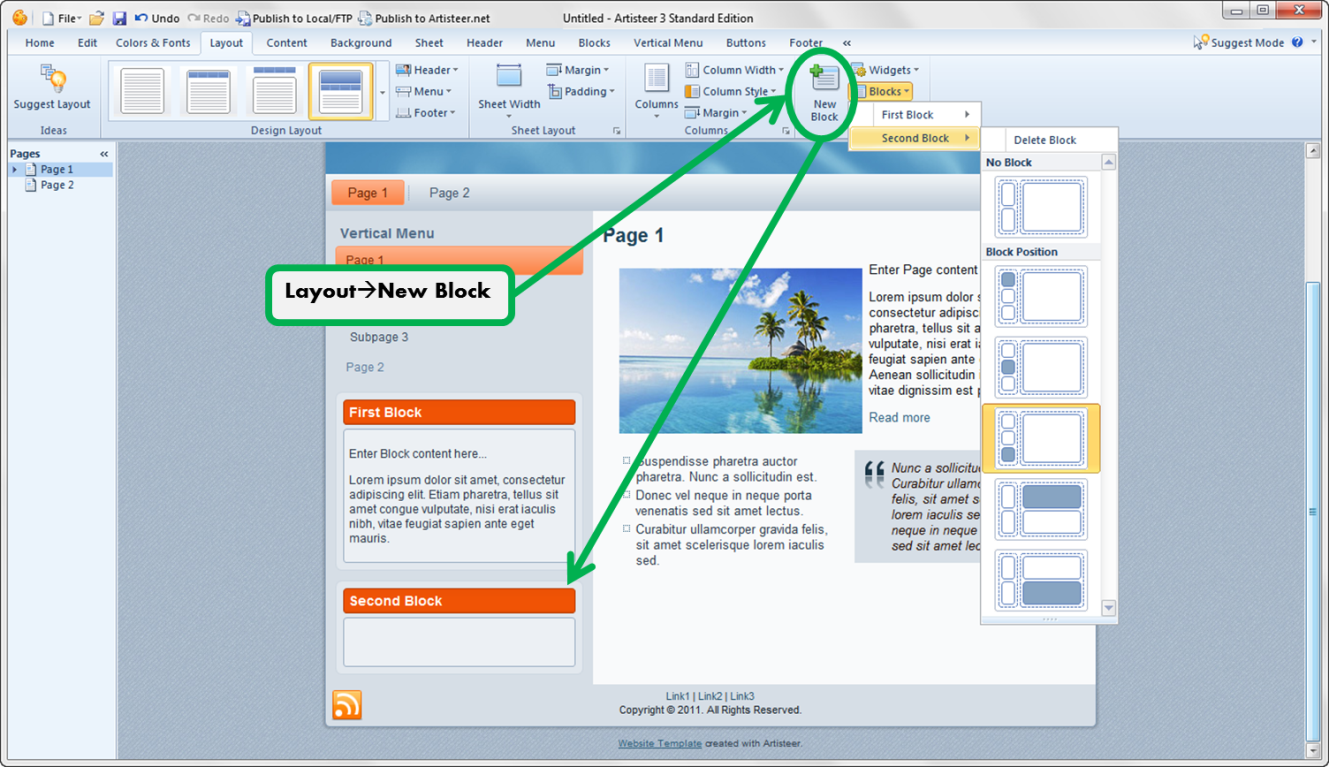
Notice that when you choose a position for the Block, it doesn’t have to be in the Sidebar; it could also be added to the Content Area column.
When you select a Block with the cursor, a rectangle appears on top of the Block to show you where you can add content.
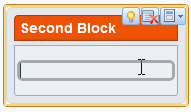
The icons in the upper-right corner are for 1) randomly selecting a design for the Block, 2) deleting the Block, or 3) changing the position of the Block.
You can edit the Block Header directly, and you can edit the Block contents very much like you can edit the content in the Content Area. Notice though, when you click on the content area within a Block, the options change slightly on the Edit tab.
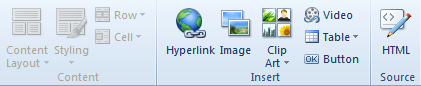
The Content tab is grayed out because these options only apply to the content within the Content Area of your page (i.e. not one of your Sidebar columns). But, there are quite a few different types of objects you can add to a Block, like Hyperlinks, Buttons, Images, and Video. Any object you insert into the block, except for text, is interactive (i.e. you can associate a link). For instance, if you have thumbnail images, or pictures representing your important pages, instead of a dull list of hyperlinks along the sidebar, you could insert a list of images or icons instead. Also, like the Content Area on your page, you can add custom code to the content of a block (Edit→HTML Source).
Styling the Block Content
You can style the Content that you add to a Block (e.g. text, links, lists etc.) using the Blocks→Block Content options.
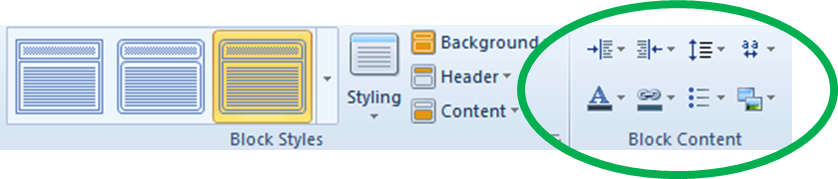
The styling for the content in a Block is separate from the styling you define for your Content Area (see Content tab), but only for these settings
- Default paragraph margins
- Default paragraph line spacing
- Default character spacing
- Default text color
- Hyperlinks
- Bulleted lists
- Image options
Everything else can be styled with the Content tab. For example, if you want to use an H1 heading in your block you can use the same H1 style you created with the Content tab. Or, you can also override the style with the Edit tab. If you don’t like the default font size for H1, select the text and change the font size (Edit→Heading1→Font Size).
Buttons are styled with the Button tab.
Using Widgets in the Sidebar
When you create a new ‘Website or Blog’ project, you may notice that the default sidebar has a Vertical Menu and a Content Block.
You can modify the Content Block but you can’t modify the Vertical Menu. You may also notice that this is not unique to the Vertical Menu. You may find sometimes there are some blocks you can edit directly and some blocks you can’t. This is because a ‘Website or Blog’ type project is also for making websites that you can host on Artisteer.net, versus some other website hosting service. Artisteer.net is a free hosting service but it’s not just for HTML websites. Since it’s WordPress based, it has a number of features you can use to turn your website into an interactive blog. One of those features is called a ‘widget’. Widgets can look often look like custom blocks, but you can’t edit them directly. A widget is a pre-defined code feature you can use to make your pages more interactive. Most CMS hosts, like WordPress, and Joomla, support widgets, although the widget names, types and terminology varies.
Except for the Vertical Menu, a widget doesn’t work automatically unless there is some code on the hosting service to support it (e.g. a CMS like Artisteer.net). This is why you shouldn’t add a widget to an HTML website. It won’t work. You can’t edit the content, and you’ll just end up with a widget and some sample content (e.g. links) that doesn’t do anything.
Add a New Widget for an Artisteer.net Website
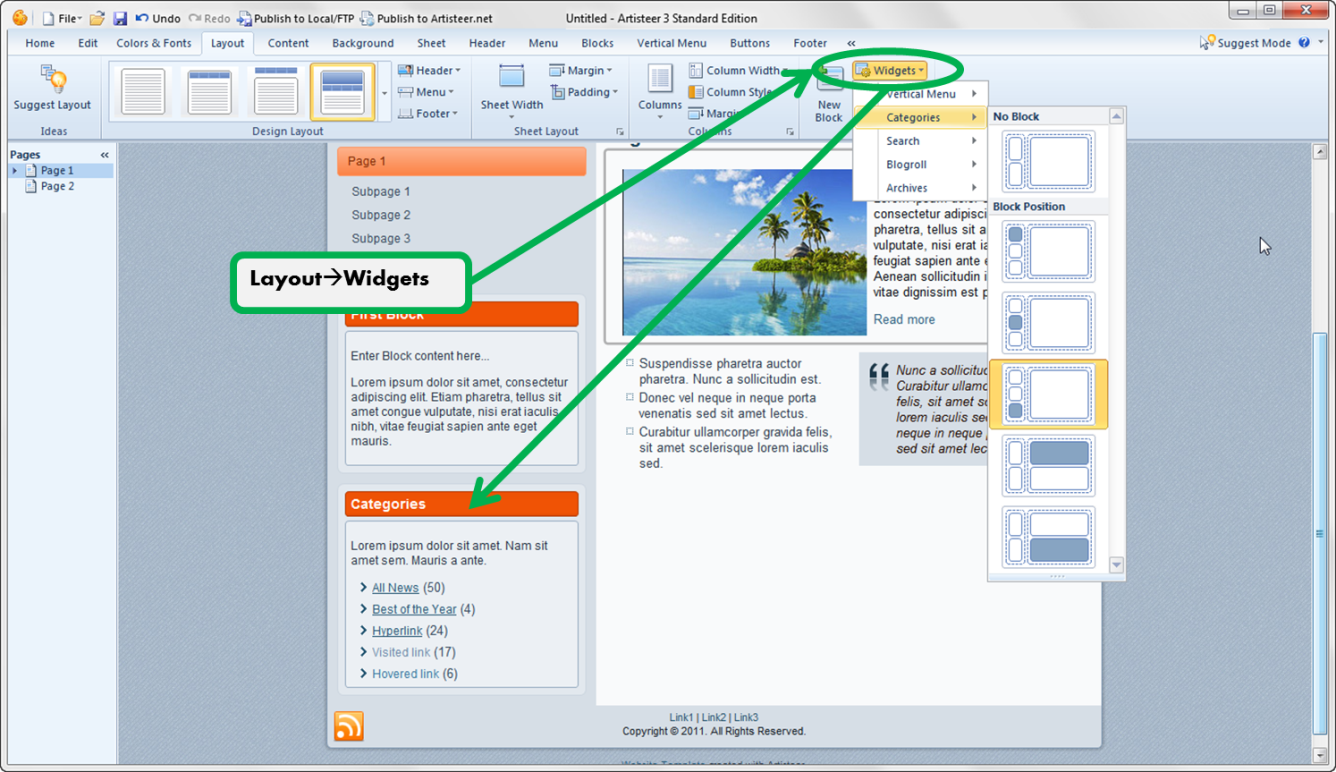
Adding a new widget to the sidebar is the same as adding a Block except you choose from one of the built-in widget types. The styling you define for the Block, using the Blocks tab, also applies to any widgets.
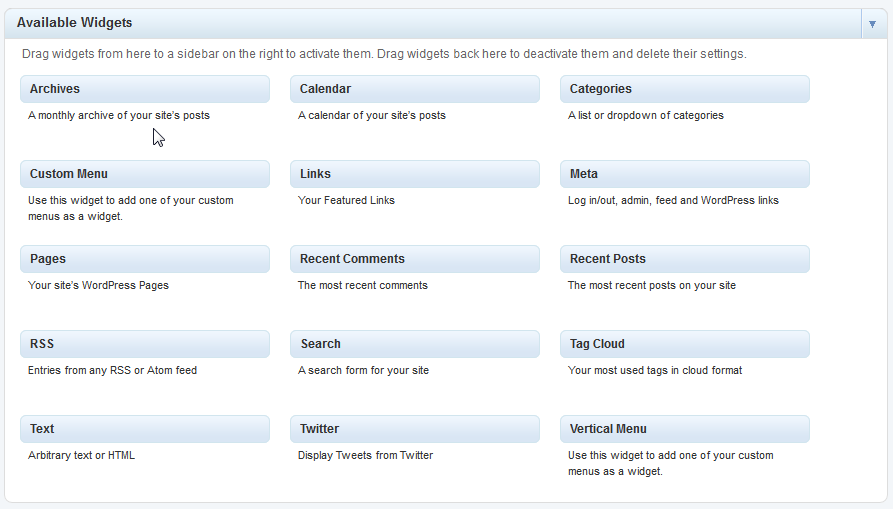
On the desktop there are five different types of built-in widgets you can add to your sidebar: Categories, Search, Vertical Menu, Archives, and Blogroll. But, there are many more widgets available on Artisteer.net:
You cannot edit the content of a widget on the desktop but you can add/edit the content on Artisteer.net. After you publish your website, the sample content in your Artisteer project is replaced by the content you added in Artisteer.net.
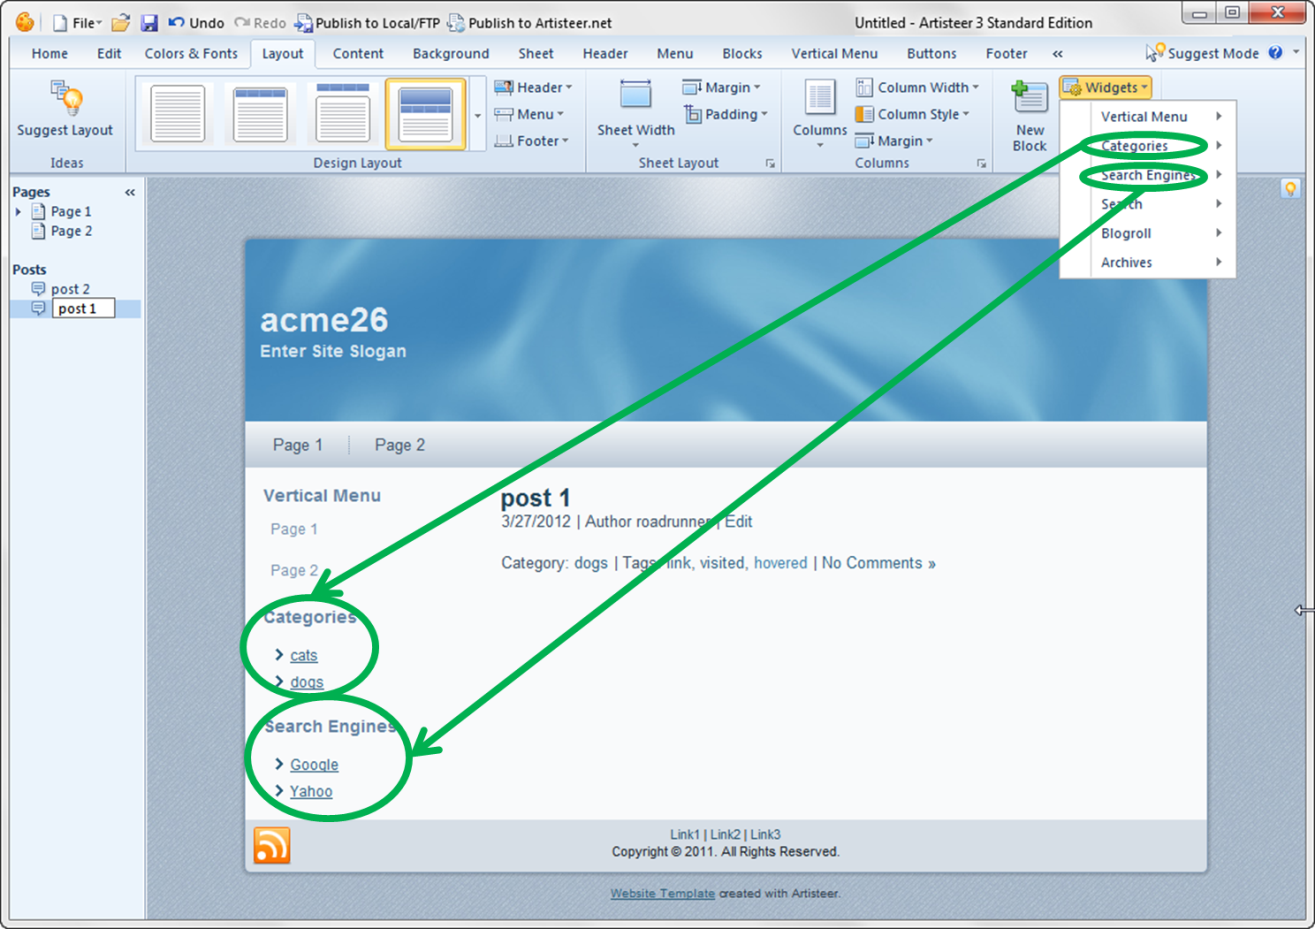
The Categories widget was added on the desktop before publishing. After publishing the website, the specific categories were then added on Artisteer.net, and then the Search Engines widget was also added as a custom menu. After re-publishing the project, now the categories (‘dog’, ‘cat’) appear under the Categories widget, and the Search Engines widget appears in the Sidebar. You can’t edit either of these widgets directly on the desktop but you can change their position and appearance. Also, notice how the Search Engine widget now appears in the Widgets menu. Any time you include an Artisteer.net widget to your website, it gets automatically added to the widget list in your project.
Vertical Menu for HTML Websites
Like the Horizontal Menu, A Vertical Menu can be used to navigate the pages of your website. For an HTML website, the menu source is always the pages of your site.
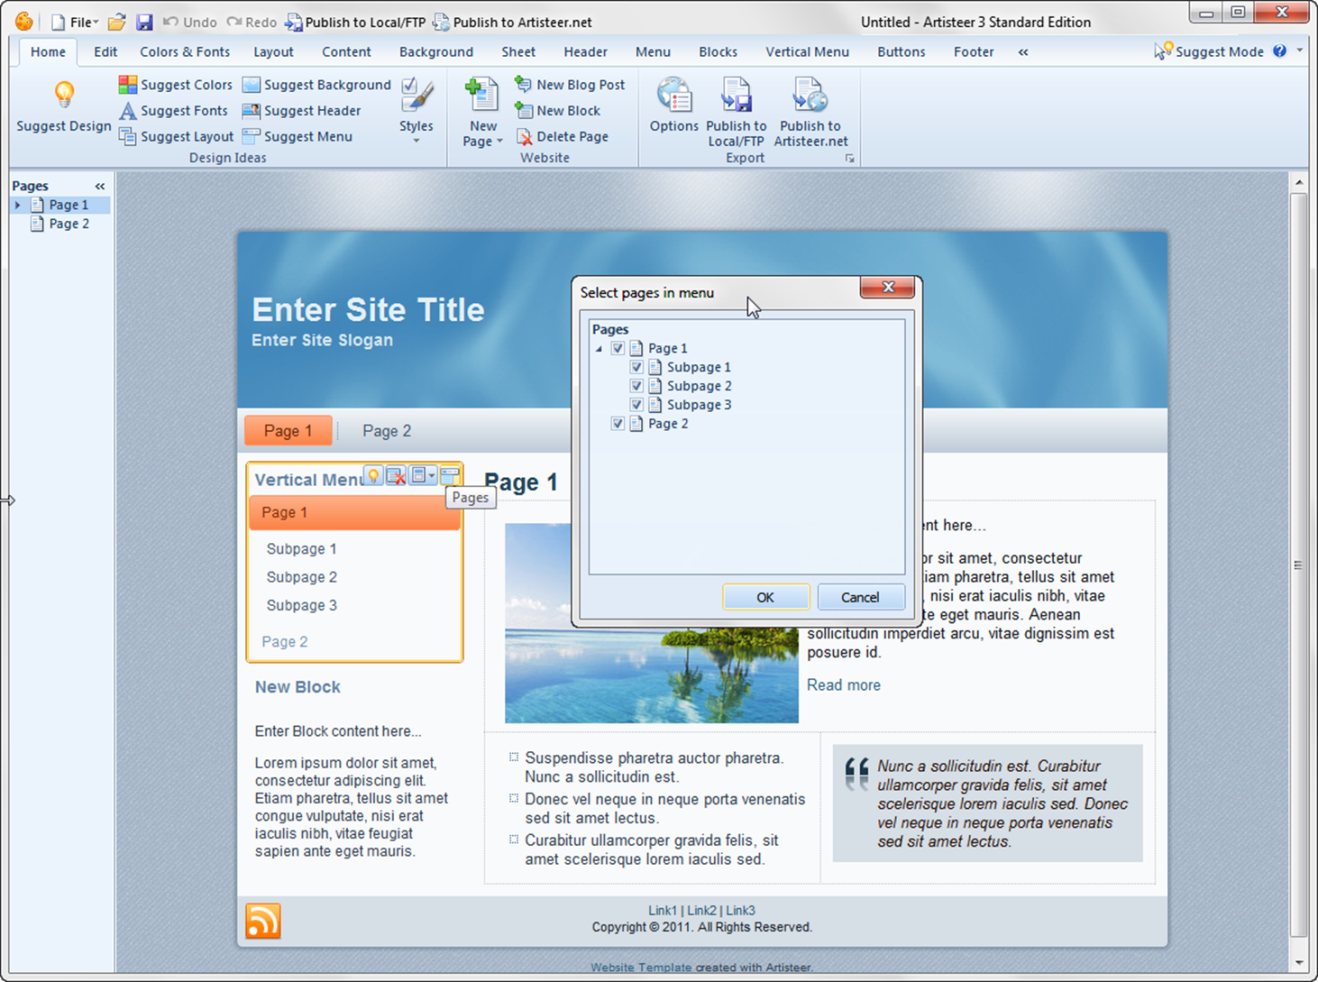
You can change the pages that appear in the Vertical Menu by clicking on the Pages icon (right-corner of the Vertical Menu title), and selecting/unselecting pages from the dialog box.
You can’t change the Vertical Menu directly in Artisteer. That is, you can change the appearance of the menu with the Vertical Menu tab but you can’t edit the links, or change the item text.
Vertical Menu on Artisteer.net
If you’re hosting your website on Artisteer.net, the Vertical Menu is handled in the same way as in WordPress. The source for the menu is one of three types:
- "The pages of your site". If your pages are arranged hierarchically, then your menu and submenu items are arranged the same way. You cannot change the links on the menu if your menu source is ‘pages’. You can only change the links if you create and assign a custom menu as described below. See Extras→Theme→Theme Options→Default Vertical Menu Source.
- "Categories of your site". Categories are a way of organizing your content (‘articles’, aka ‘blog posts’) so your users can more quickly find pages related to topics that interest them. You create the categories on Artisteer.net, and then as you add articles to your site, you associate them with the categories you created. See Extras→Theme→Theme Options→Default Vertical Menu Source.
If you have a category called ‘dogs’ and you have several post articles about ‘dogs’, you don’t create a page to list your articles about ‘dogs’. Like the Categories widget, you create a category and assign the article to this category. When you click on the link in the menu, Artisteer.net creates a new page automatically by finding all the articles about ‘dogs’ and redirects you to that page.
- "Custom menu". If you don’t want the menu to be about navigating pages, or selecting categories, then you need to create a custom menu. You can only do this with Artisteer.net. You can’t do this with an HTML website.
In Artisteer.net, use the Menus tab on the ribbon bar (Home→Menus):
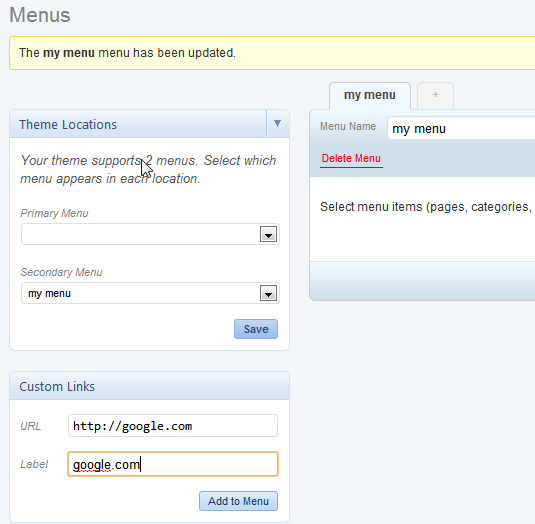
Enter a name for your menu, and then define the items for your menu with the Custom Links dialog. Here we just created two simple links to redirect viewers to Google and Yahoo. When you’re done, make sure you save your menu.
Under Theme Locations on the Menus page, you may notice that there are two options: Primary Menu, and Secondary Menu. Primary refers to the Horizontal Menu on your page, and Secondary refers to the Vertical Menu. Normally, when you assign your custom menu to one of these types, your menu becomes the source for one of these menus. For example, if you create a custom menu and then assign it to the secondary menu, then your custom menu becomes the source for the Vertical Menu. But, if you find that this doesn’t work for you, there is another way:
Go to the Widgets page in Artisteer.net:
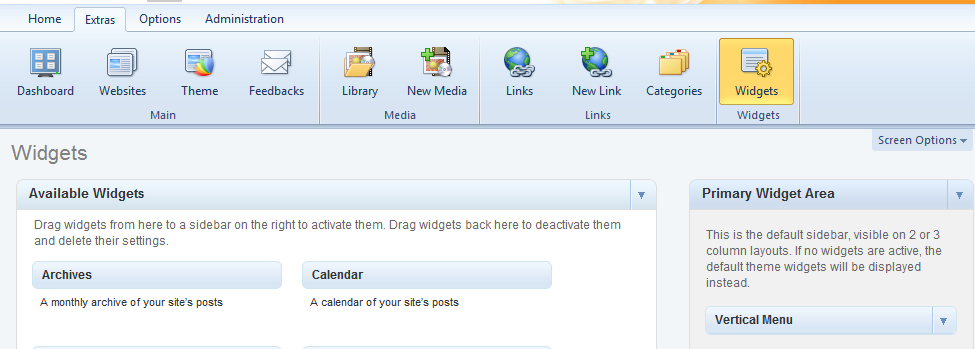
The Vertical Menu is by default assigned to the Primary Widget Area. For an explanation of the Widgets page, please refer to the Artisteer.net manual. You can also find a nice layout of the widget areas.
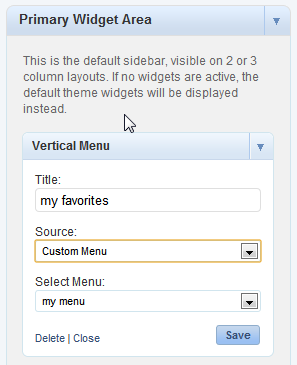
If the Vertical Menu does not appear in the Primary Widget Area, drag&drop the menu from the list of widgets. Enter a title for the menu, as you want it to appear on your page, then ‘custom menu’, and select the custom menu you just created, and then ‘Save’.
Now your vertical menu appears like this: